How To Archive Emails Using Thunderbird
One of the ways to archive emails is by using Mozilla Thunderbird - a popular and free mail client through which you can connect to your mailbox. It can be downloaded by going here.
After you install it on your computer, you will first need to set up the account. You can find the instructions here.
After setting up the account, follow the instructions below to archive your email.
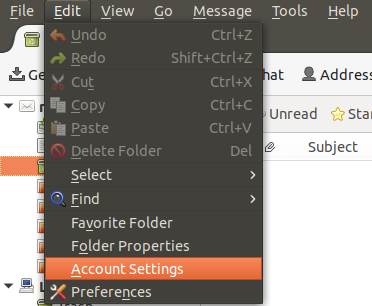
1.Click on the Edit menu then Account Settings.
2.Select the Local Folders setting and click on Browse.
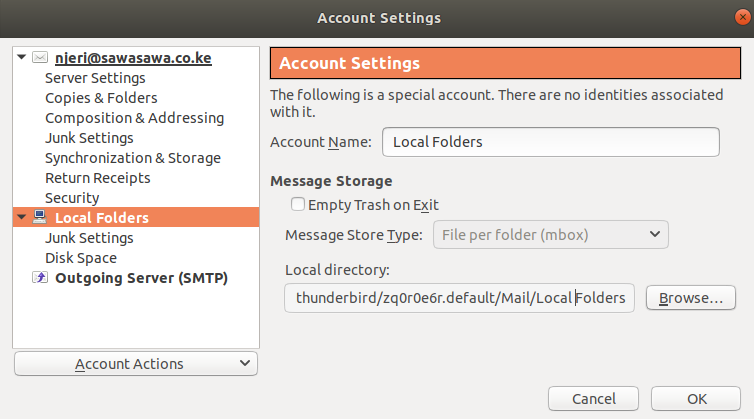
3.Select the target directory for Local Folders. This is where your messages will be saved when you archive.
4.Select the desired email account in the left panel then select Copies & Folders.
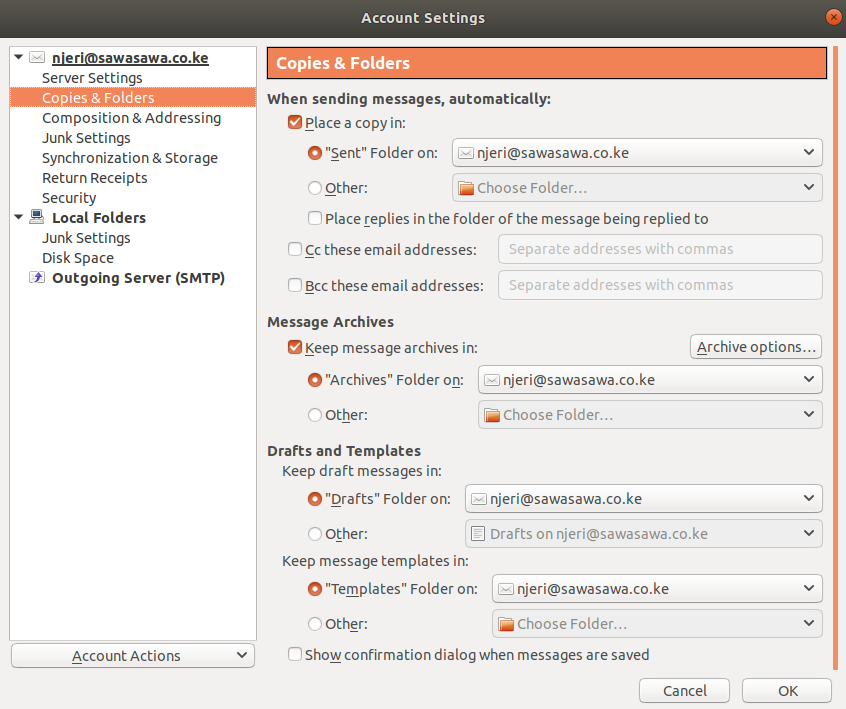
5.Under Message Archives section, ensure Keep message archives in: option is checked.
6.Select Other option and from the drop-down list, click Local Folders and then navigate to the folder you defined in Step 3.
7.You can define how Thunderbird organizes your archived messages by clicking the Archive options button.
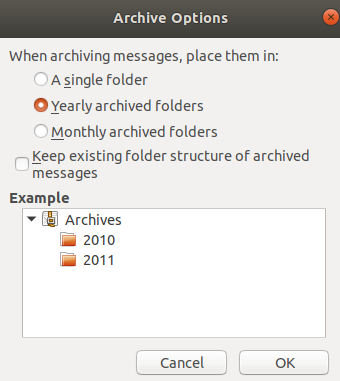
8.Make your choice out of the different options provided under Archive Options dialog and then click OK. The Example box gives you a preview of how the messages will be organized, updating with every different choice.
9.Click the OK button at the bottom of the Account Settings window.
10.Go to the folder containing the messages you want to archive e.g Inbox folder.
11.Select the messages to archive, and then open the Messages menu and select Archive (you could also simply right-click on the selected messages and click Archive). I recommend no more than 500 at a time.

12.Thunderbird will then copy the selected messages and then delete them from the folder (server-side), thereby freeing up space.